iPod is Disabled Connect to iTunes: How to Undisable an iPod?
“My iPod says it is disabled connect to iTunes. How to unlock it?”
iPods have always been a major device in the Apple lineup, and the player has maintained its high performance. However, like every electronic gadget, the iPod is not immune to errors. If you have ever used an iPod or own one currently, you have probably had your iPod disabled for some reason, with the error, “iPod is disabled connect to iTunes.”
“The iPod is disabled connect to iTunes” error is relatively common, but despite what the error prompts, you do not have to connect the device to iTunes. With the recommended iTunes, you risk losing all the data saved on your iPod. Here, we will show you how to undisable an iPod using iTunes, as well as other, more convenient software.
- Method 1. Best Way to Unlock A Disabled iPod without iTunes
- Method 2. Undisable an iPod with iTunes
- Method 3. Undisable an iPod with iCloud website
- Method 4. Undisable an iPod Using Recovery Mode
Method 1. Best Way to Unlock A Disabled iPod without iTunes
The best method will not be mentioned last as usual. We begin this post about how by going right to the very best choice out there. Although my iPod says it is disabled connect to iTunes, the better tool for fixing this error is LockWiper from iMyFone.
iMyFone LockWiper makes the undisabling process as smooth as possible. It gives you the advantage of speed, efficiency, ease-of-use, and flexibility. Not sure how I mean? Check out the following features packed in LockWiper.
Free TrialKey Features
- Undisable your iPod and enjoy all the rich features of your device without limitations.
- After undisabling the iPod using LockWiper, the device will be safe to use. The old Apple ID cannot track, block, or erase the iPod.
- LockWiper iPhone passcode hack software is also useful in helping you bypass iOS device(including iPod) lock screens and passcodes forgotten in every scenario.
- Unlike with other methods, you do not lose your iPod data in the process of undisabling with iMyFone LockWiper.
- The undisabling process is swift and incredibly easy to use, even without prior tech knowledge or experience.
- This software promises a 100% success rate.
How to undisable an iPod using LockWiper
Step 1: Prepare for the iPod undisabling process
To begin the operation on your iPod, launch iMyFone LockWiper on the PC. From the first window you see, click on the “Unlock Screen Passcode” mode and click “Start.”
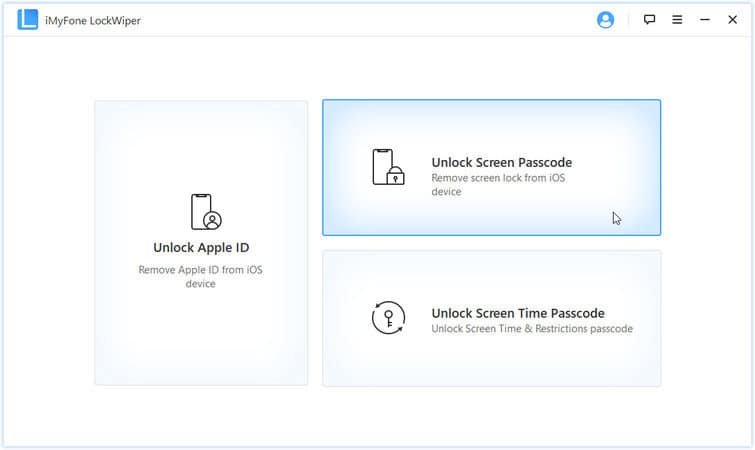
Before continuing with this operation, bear in mind that your iPod will be updated to the latest iOS version, and all the data will be erased from the iPod.
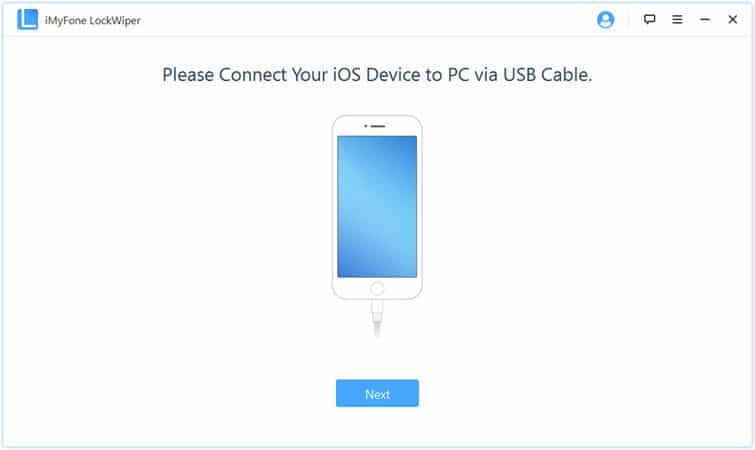
After clicking “Start,” connect the iPod to your PC using a USB cable and hit the blue “Next” button.
Step 2: Install the firmware package onto your iPod
When your iPod is connected, and you click “Next,” LockWiper begins to pull up information about the device. Using this information, it gets appropriate firmware for the iPod for you to download. To download the firmware, click the “Download” button.
If you prefer to download it with your browser or a download manager, click “Copy.” Another option is to click “Select” and import the firmware onto LockWiper if you already have it on your system.
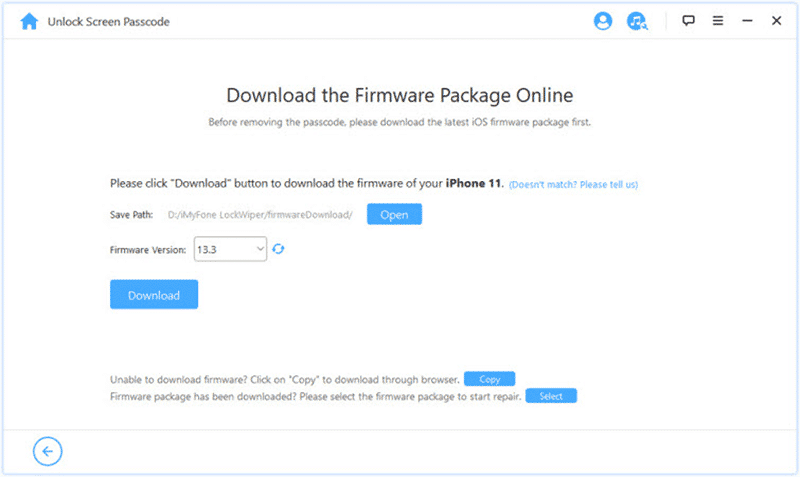
In this guide, we will download the firmware with iMyFone LockWiper. So, hit “Download” and allow the program to verify and download the firmware.
Next, you need to extract this downloaded firmware. Click the “Start to Extract” button to do so.
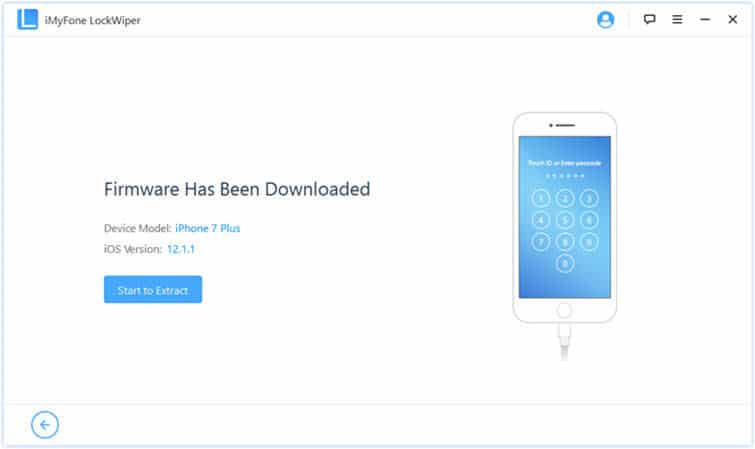
Step 3: Undisable the iPod
Finally, you are all set now to undisable your iPod. Click “Start to Unlock” to get it running. Make sure that you keep the iPod connected to your computer throughout the unlocking operation. When the extraction completes successfully from the previous step, you will see a button labeled “Start Unlock.” Click on it to begin.
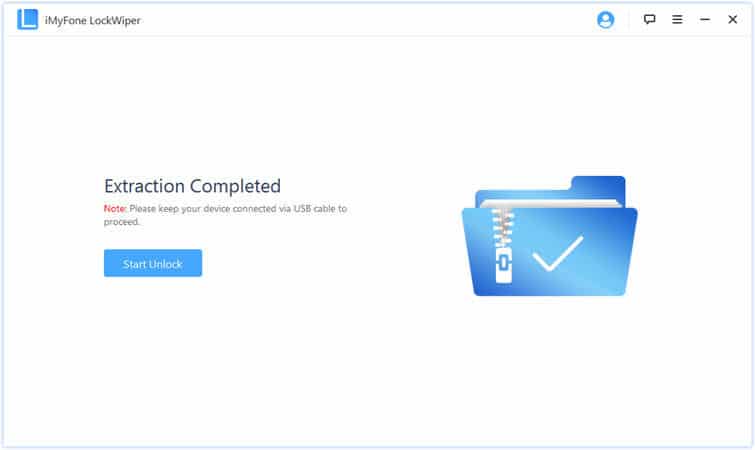
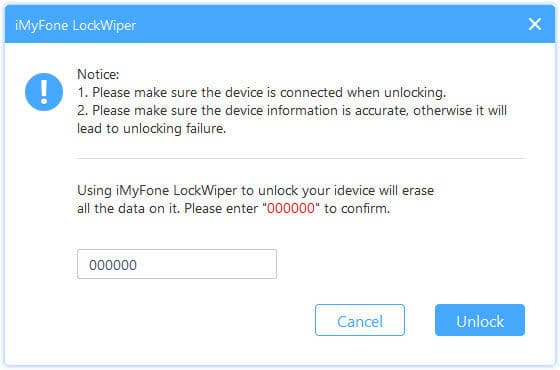
iMyFone LockWiper now warns you of the implications of the unlocking – read these well to decide if you wish to proceed. Next, enter “000000” as instructed to confirm that you are ready to go forward, and then hit “Unlock.”
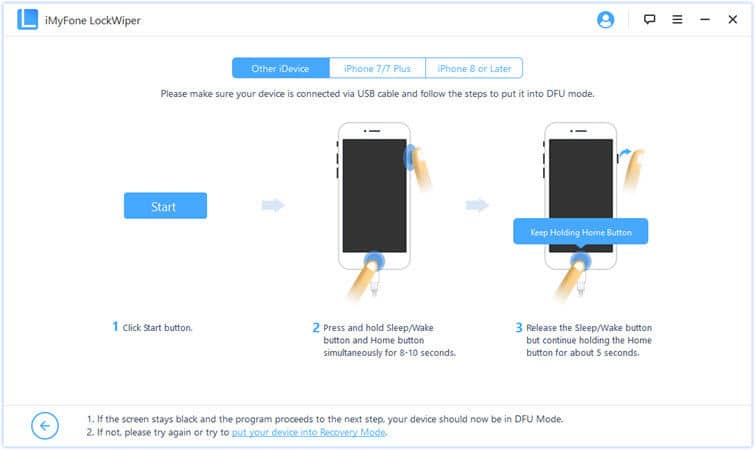
If this undisabling does not work, put your iPod in DFU or Recovery mode. Not sure how to do this? LockWiper provides easy, device-specific step-by-step instructions on how to enter DFU/Recovery Mode.
In LockWiper, navigate to the “Other iDevice” tab. You will see graphics like the one below containing the instructions on how to enter DFU mode. If DFU mode also fails, click the “Put your device into Recovery Mode” link and try using the Recovery Mode.
After putting your iPod in Recovery Mode, the unlocking should start and complete in no time.
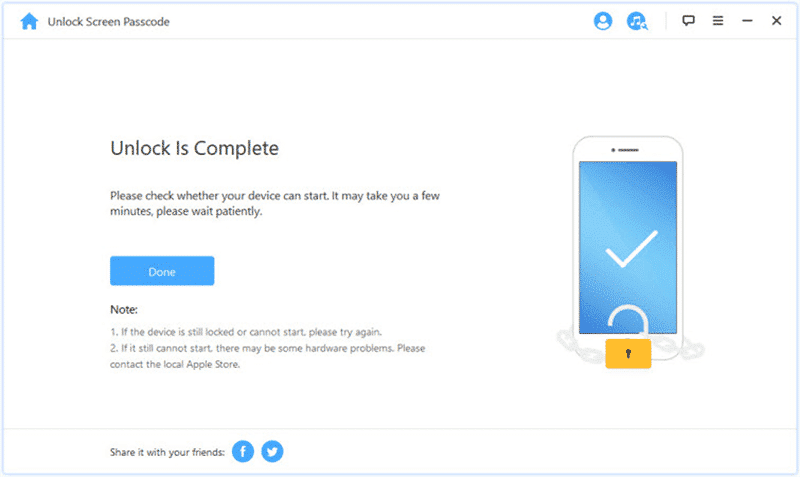
Once the reset is completed, then attempt again on LockWiper. This time, it goes smoothly because the Find My iPhone feature is no longer enabled.
On the successful undisabling of your iPod, it restarts as a new device, no longer linked with the Apple ID and iCloud accounts. On restarting, you can now set it up with a different account if you wish.
Now that you know how to unlock a disabled iPod without iTunes, the following method below shows you how to fix a disabled iPod using iTunes this time.
Method 2. Undisable an iPod with iTunes

In the above solution, we learned how to fix a disabled iPod using a program that is more user-friendly and efficient than iTunes. iTunes is the official Apple desktop application you use for managing your iOS devices, such as the iPod. By managing, we mean that iTunes helps you install apps, transfer music, back up and restore devices, troubleshoot the devices, etc. In this case, we will show you how to undisable an iPod using iTunes.
Find the steps below:
Step 1: Connect the device to your PC
To use iTunes to work on your iPod, the first step is to connect it to a computer that has iTunes installed on it. For this method to work, you must have synced your iPod with this computer or backed it up on the PC previously.
Step 2: Go to iTunes
After connecting the iPod to your computer, open iTunes and give it a few seconds to detect the connected iPod. Once iTunes finds your connected iPod, it immediately shows the name on the top left-hand corner starts to synchronize and back up the iPod.
Step 3: Restore the iPod data
The backing up and synchronizing takes some time, depending on the volume of data on the device. After it a couple of minutes, they both complete and display the iPod details. To finalize the restore, hit the “Restore.”
Method 3. Undisable an iPod with iCloud website
The third thing you can do when your iPod says that the iPod is disabled connect to iTunes is to undisable it with the help of the iCloud website. You can only use this method, however, if your device is connected to the internet. Also, you must have registered your iPod in the iCloud menu with the Find my iPod server and your Apple ID.
Note that undisable your iPod with the iCloud website will delete your data and won’t let you back it up beforehand. However, if you have other backups, you can still restore them to the iPod quickly.
Without further ado, let us show you how to unlock a disabled iPod without iTunes but with the iCloud website.
How to undisable an iPod with the iCloud website
Step 1: On the internet browser of another device or computer, visit the iCloud website on icloud.com/find.
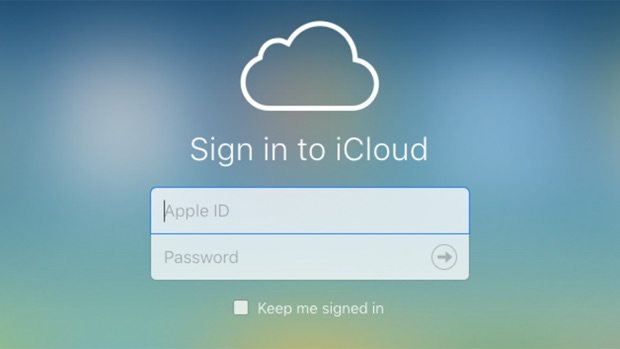
Step 2: Next, log in to iCloud using the Apple ID linked with your device.
Step 3: When you get into iCloud, click on the “All Devices” button to show you every device associated with the Apple ID you are logged in.
Step 4: From this list of devices, click on your iPod to reveal further details about the device.
Step 5: Finally, click on “Erase” and confirm the action. This immediately begins to undisable the iPod.
The operation does not take a lot of time. When it completes successfully, the iPod will restart to the setup screen. At this point, you will have the option of restoring a backup.
If the Find My iPhone service fails to contact your iPod or is asked to enter a passcode, you still have one option left – how to undisable an iPod using the Recovery Mode.
Method 4. Undisable an iPod Using Recovery Mode
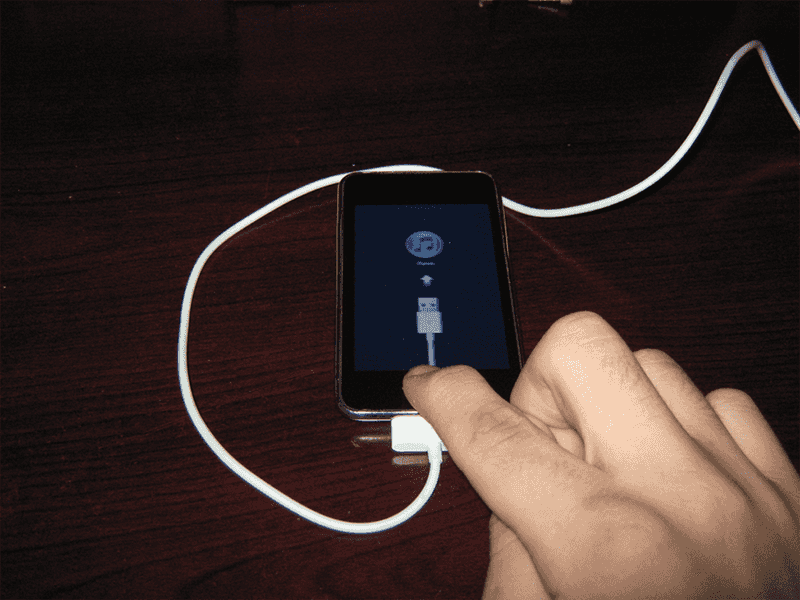
Always use the Recovery Mode as a last resort because it works with root access. The iOS Recovery Mode is a powerful state in which the device allows external connections to work on its architecture. If all of the previous methods do not undisable the iPod, learn how to fix a disabled iPod using the Recovery Mode.
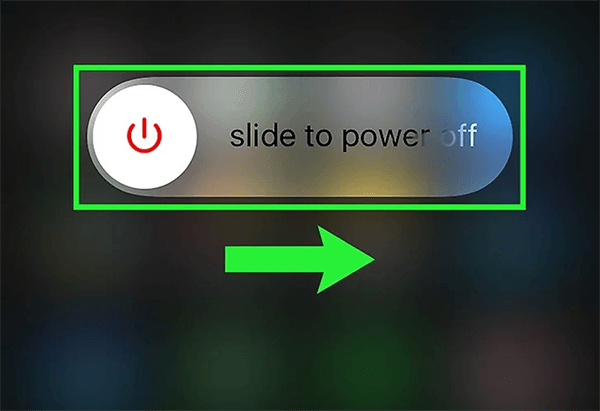
Step 1: Turn off the iPod by pressing and holding the Power button. Release this button when you see the Power slider. Slide it to turn off the iPod.
Step 2: When the device is off, get a reliable USB cable and connect the iPod to a computer that has iTunes installed on it. This method will work whether or not your iPod is synced to the PC.
Step 3: Launch the iTunes software on your computer. You can download it free from the official Apple website here. Download, install, open it, and continue to step 4.
Step 4: Next, press and hold the Home button + Power button and release these buttons when the Apple logo appears.
Step 5: On iTunes, a new window opens. On this screen, hit the “Restore.”
The iCloud website is another platform where you can see how to unlock a disabled iPod without iTunes. Similar to the other methods, after you undisable your iPod using the Recovery Mode, the device restarts and lets you set it up as a new iPod. You can also restore any backups you have at this stage.
Conclusion
You have learned how to unlock a disabled iPod without iTunes and with iTunes. The iCloud website, Recovery Mode, and iTunes are official Apple recommended methods of clearing this error. They will all work correctly if you follow the steps carefully. However, LockWiper is faster, more straightforward, safer, and will not wipe off your files, apps, and settings.
Twice have I had this error where my iPod says it is disabled connect to iTunes, and iMyFone LockWiper got me through quickly without losing any data. This is why the software comes highly recommended. If you are reading this conclusion, you have hopefully been able to resolve this error using one of how to undisable an iPod guides here.
Free TrialRelated posts
Recent Posts
- How to Turn Off Samsung Tablet without Password
- How to Make A Password Reset Disk for Another Computer
- How to Reset Password on Sony Vaio Laptop Windows 7/8/10
- How to Print A Secured PDF without Password
- How to Remove Read-Only from Excel
- How to Hack or Crack Password Protected PDF File
- How to Fix Windows 10’s Defaultuser0 Password Issue
- How to Disable Windows Hello Pin
- How to Make A Word Document Read Only
Related Posts
- How to Reset Screen Time Passcode on iPhone If You Forgot It
- How to Unlock iPhone 12/11/X/8/7/6/5S Passcode without Computer
- iPad is disabled? Why and How to Unlock Disabled iPad
- How to Unlock iPad Mini/Air/Pro without Passcode
- Locked Out of iPad? How to Reset A Locked iPad
- How to Get Into A Locked iPhone 11/X/8/7/6/5S without Password
- How To Turn Off Screen Lock On iPhone Without Password
- How To Unlock A Disabled iPhone 12/11/X/8/7/6/5S Without iTunes
- How to Bypass iPhone 12/11/X/8/7/6/5S Passcode
