How to Make A Word Document Read Only
Microsoft Word is the world’s foremost word processor. Therefore, the MS Word document formats, such as DOC and DOCX, are among the most widely shared in the world. Most other word processor applications also support Word’s document formats, which enables users to open them with many alternative software packages.
By default, MS Word documents are editable ones that users can modify in most word processors. However, some users might try to change them to read-only documents. Those who need to share their Word documents with other persons might prefer them to be read-only so that the recipients can’t change their contents in any way. Then the recipients can only view the shared Word documents.
Some users might convert their Word documents to PDF format to make them non-editable. However, there are numerous ways you can make a Word doc read only without changing its file format. This is how to make a Word document read only with five alternative methods.
- 1. Make A Word Document Read Only from Properties
- 2. Make A Word Document Read by Marked as Final
- 3. Make A Word Document Read-only by Restrict Editing Feature
- 4. Make A Word Document Read-Only with “Read-only Recommended”
- 5. Make A Word Document Read-Only by “Password to modify”
- Bonus Tips: What to do If Forgot Word Document Password
1. Make A Word Document Read Only from Properties
Step 1: First, open File Explorer, which has a Windows key + E hotkey.
Step 2: Next, open the folder that includes the Word document you want to make read-only.
Step 3: Right-click a Word document file to select “Properties.”
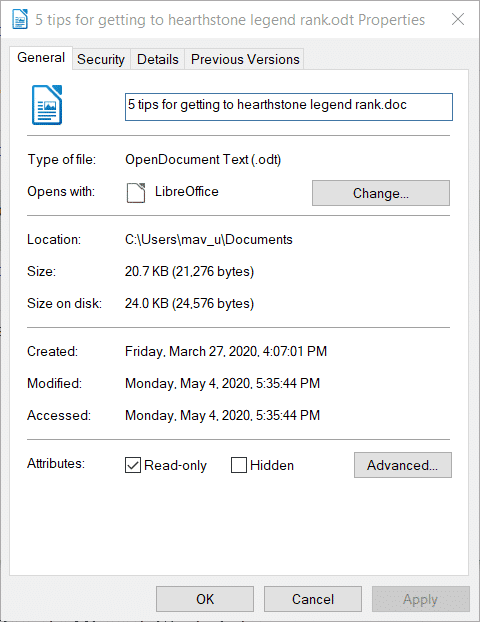
Step 4: Select the “Read-only” option on the General tab.
Step 5: Click the “Apply” button.
Step 6: Select the “OK” option.
Note that the above method isn’t an entirely full-proof way to make a document non-editable. Those persons you share the document with might still be able to select an “Edit Document” option in their word processors when they open it.

2. Make A Word Document Read by Marked as Final
Step 1: Open the Microsoft Word window.
Step 2: Select the File tab shown directly below.
Step 3: Click Info on the left of the File tab.
Step 4: Click the “Protect Document” button.
Step 5: Select the “Mark as Final” option.
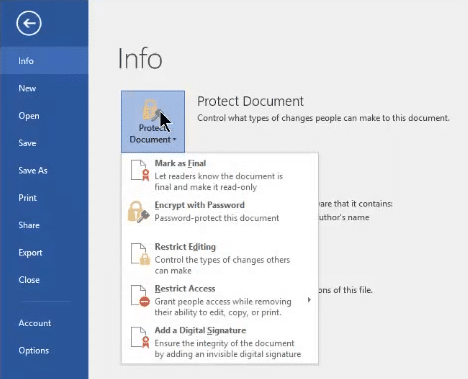
Step 6: Press the “OK” button on the dialog button that opens to confirm.
Step 7: A Save As window will then open. Select a folder to save the file to.
Step 8: Enter a title in the File name text box.
Step 9: Select the “Save” option.
Step 10: Thereafter, a dialog box window will open that states, “This document has been marked as final to indicate that editing is complete and that this is the final version of the document.” Click OK on that dialog box.
Now the document will display a “Marked as final” message when somebody opens it. Users can still click an “Edit Anyway” option. However, the “Marked as final” message still discourages user editing.
3. Make A Word Document Read-only by Restrict Editing Feature
Step 1: The “Restrict Editing” option in Word (2007-2019) is a more full-proof way to stop document editing. Open Microsoft Word first, following is how to make a Word doc read only.
Step 2: Select the Review tab shown directly below.

Step 3: Press the “Restrict Editing” button. That option opens the Restrict Editing sidebar in the image directly below.
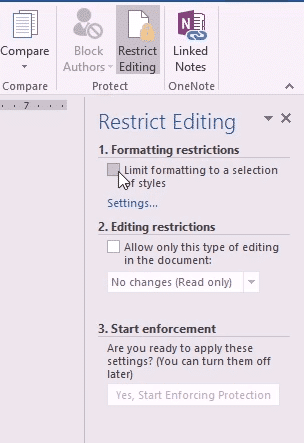
Step 4: Select the “Allow only this type of editing” in the document checkbox.
Step 5: Select the “No changes (Read-only)” option.
Step 6: Click the “Yes, Start Enforcing Protection” button to open the window shown directly below.
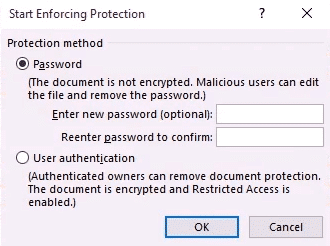
Step 7: Select the “Password” radio button.
Step 8: Type in a password to enforce the editing protection.
Step 9: Click “OK” on the Start Enforcing Protection window.
Now nobody can edit the document without disabling its protection. To disable the editing restriction, you’ll need to click the “Stop Protection” button. Then enter the password to turn off the editing restriction.
4. Make A Word Document Read-Only with “Read-only Recommended”
You can also configure an MS Word document to open with a read-only dialog box prompt. That prompt asks users if they want to open the document as read-only. To set up a read-only prompt for a file, you’ll need to select the Read-only Recommended option as outlined below.
Step 1: Open your MS Word software.
Step 2: Open the document to add the read-only prompt to.
Step 3: Click the File tab in Word.
Step 4: Click “Save As” on the left of the window.
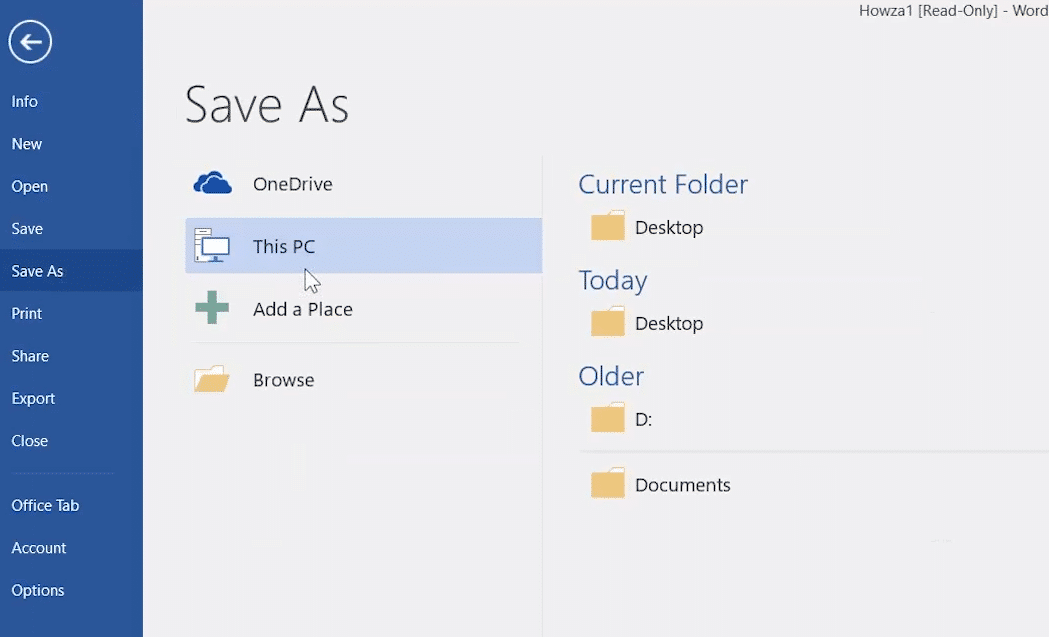
Step 5: Press the “Browse” button.
Step 6: Select a folder to save the file to in the Save As window.
Step 7: You can also enter a new file title, but that’s not essential.
Step 8: Click the small arrow on the “Tools” button to open a drop-down menu.
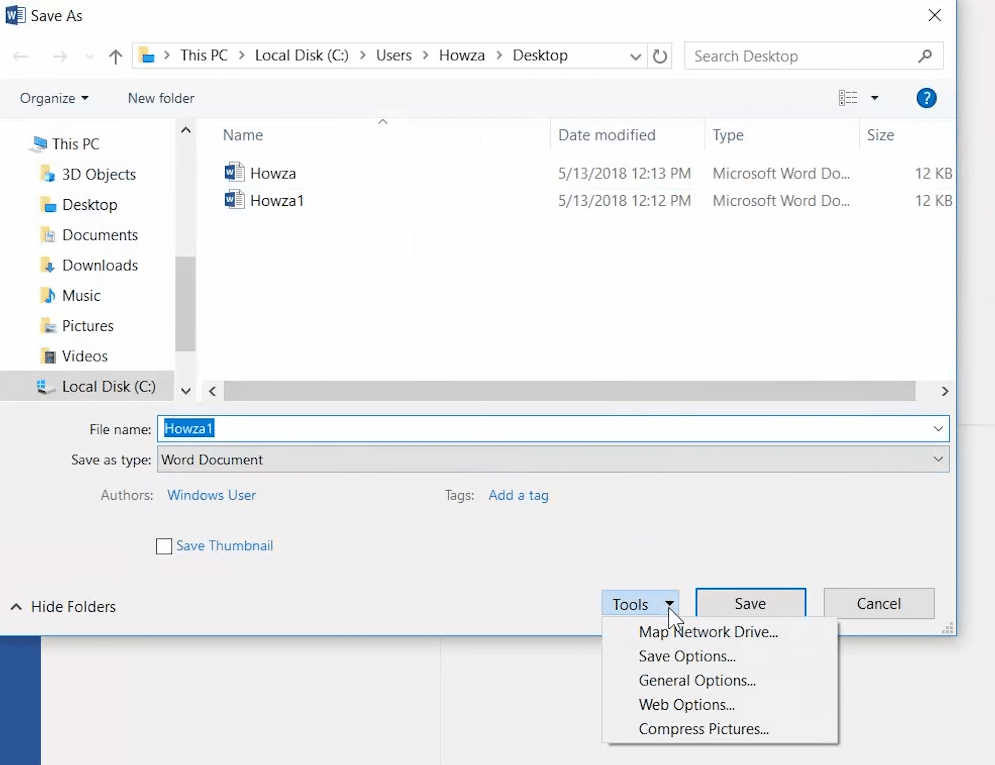
Step 9: Select “General Options” to open the window shown in the image directly below.
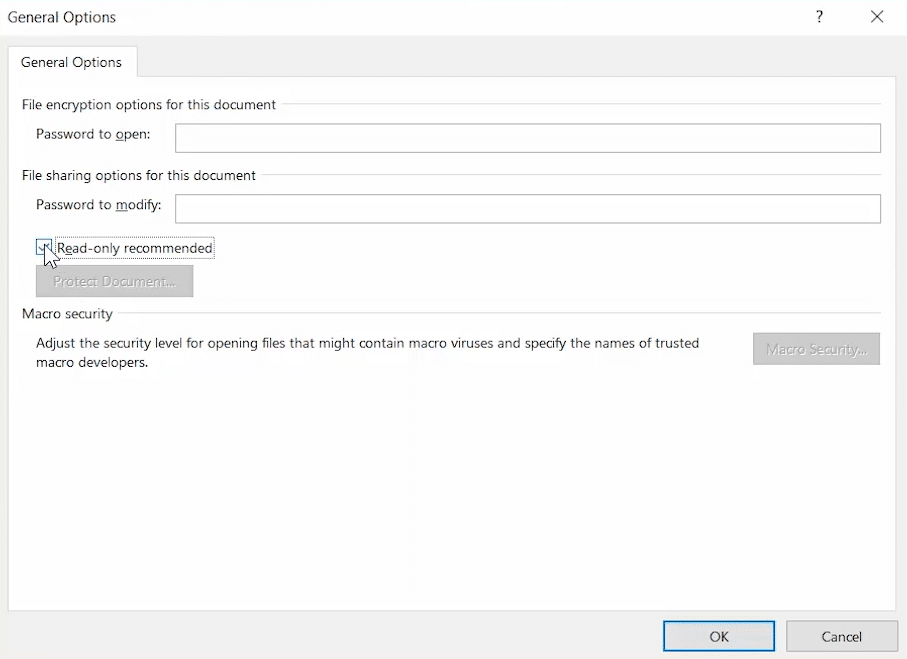
Step 10: Select the “Read-only recommended” option.
Step 11: Press the “OK” button to close the window.
Step 12: Click the “Save” button.
5. Make A Word Document Read-Only by “Password to modify”
You can also enter a password in the Password to modify box on the General Options window. Here is how to make Word file read only.
Step 1: To do that, open a file to apply password to and the General Options window as outlined from steps one to nine within the previous method.
Step 2: Type in a password within the Password to modify box.
Step 3: Next, click the “OK” button.
Step 4: Then input the same password again in the Confirm Password window that opens.
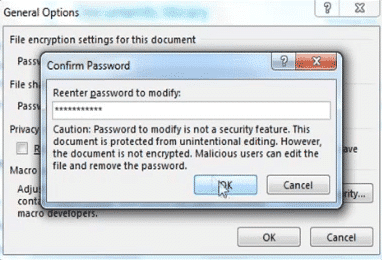
Step 5: Click “OK” to close the Confirm Password window.
Step 6: Select the “Save” option on the Save As window.
Now users will need to enter a password to edit the file. However, users can still click “Read Only” to view a non-editable document.
Bonus Tips: What to do If Forgot Word Document Password
Two of the above methods will add passwords to your Word documents. Although those are the most full-proof methods for making them non-editable, some users might forget the passwords! Users who forget the passwords for their Word files won’t be able to edit them either.
If you ever get into a pickle with document passwords, check out the Passper for Word. It enables you to recover passwords for Word documents or remove them. It includes a “Remove Restrictions” option you can select to remove file modification passwords on your MS Word files.
Free Trial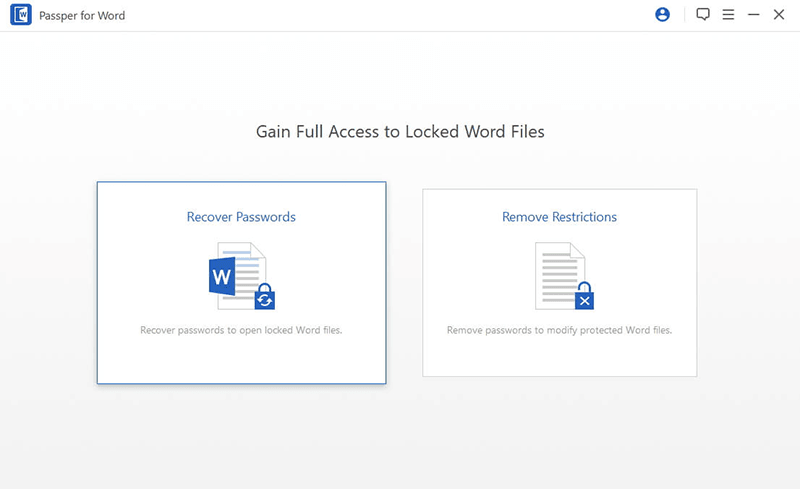
Passper for Word is’t a free Word password recovery software. That program is available with three alternative plans. You can fully utilize the software for a month with the $19.95 1-Month Plan. Users who purchase it with the $49.95 Lifetime Plan can utilize it with no time constraints.
Conclusion
So, that’s how to make a Word document read only so colleagues you share them can’t modify their contents. Methods three and five are the most full-proof ways to ensure other users you share the documents with can’t edit them. The other methods will still ensure colleagues can’t accidentally modify Word documents you share with them.
Free TrialRelated posts
Recent Posts
- How to Turn Off Samsung Tablet without Password
- How to Make A Password Reset Disk for Another Computer
- How to Reset Password on Sony Vaio Laptop Windows 7/8/10
- How to Print A Secured PDF without Password
- How to Remove Read-Only from Excel
- How to Hack or Crack Password Protected PDF File
- How to Fix Windows 10’s Defaultuser0 Password Issue
- How to Disable Windows Hello Pin
- How to Make A Word Document Read Only
Related Posts
- How to Unlock Encrypted Word Document without Password
- Forgot Word Document Password? Here’s How to Recover
- How to Edit A Protected Word Document without Password
- How To Unprotect Word Document Without Password
- How to Unlock Microsoft Word Document with/without Password
- How to Open Password Protected Word Document?
- Top 8 Best Word Password Recovery Software/Online 2024
- How to Remove Password from Word Document without Password