How to reset a gateway laptop without password
Well, if you don’t know about Gateway, Gateway is one of the most popular desktop manufacturing companies. First, this company was recognized by the name of Gateway 2000. It was founded in 1985, and ever since then, it is still manufacturing, although, in 2007, the company was acquired by Acer. They have stopped making plasma TVs and other electronics and only manufacturing desktops and laptops.
So, you forgot your Gateway Laptop password, Well forgetting a password is a problem that many people face. Because when we are setting up our password, we try to think of a combination of words or numbers that are most difficult for anyone else to know. But most of the time, we end up forgetting about them because they are so hard. There is no need to worry; there are many ways to reset gateway laptop without a password. Things like this may look complicated but trust me; they are quite straightforward.
This article will show you how to reset a gateway laptop without password step by step, so you don’t have to pay someone else or become a geek to do it. Suppose you were wondering that how do I reset my gateway laptop password; look no further. This article will show you every possible way, and later on, you can even show off these tricks in front of your friends and surprise them. There are various methods to solve this problem that I will describe properly.
- Method 1: Reset Gateway Laptop Password with Reset Disk
- Method 2: Reset Gateway Laptop Password with Windows Password Reset
- Method 3: Reset Gateway Laptop Password with Windows Installation Media
- Method 4: Reset Gateway Laptop Password with Offline NT Password Registry Editor
Method 1: Reset Gateway Laptop Password with Reset Disk
Password reset disk is basically a Windows program that helps you create a backup to reset your password anytime you want. If you have made this before, this is the first thing you should do to reset password on gateway laptop.
Step 1: To use it, you will have to insert the USB drive in your gateway laptop and wait for it to load; when you see the login screen asking for your account password, click on “Reset password.”

Step 2: Clicking on the reset password will open a window like this shown below. In this window, you have to select the disk drive you will use for the reset disk.
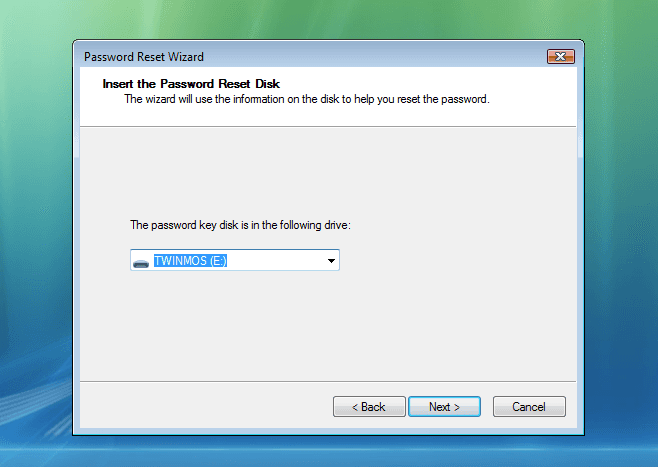
Step 3: After you have selected the drive, you will have to click on “Next,” which will lead to this window.
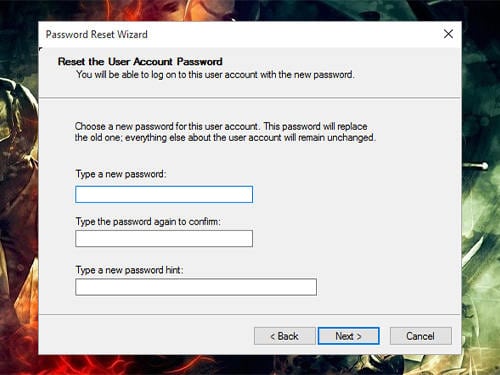
Now type in your new password, and type it again to confirm; make sure this time you leave yourself a good hint to remember the password and then click on Next.
Congratulations! Now the password is changed, you can use the new password to log in to the gateway laptop.
Method 2: Reset Gateway Laptop Password with Windows Password Reset
The Windows Password Reset tool is not here to waste your time, this software will take less than 5 minutes to get your work done, and with a user-friendly interface, it’s effortless for even an average user to make it work. All it takes three simple steps. Just follow this guide about how to unlock a gateway laptop without password below.
Step 1: Download the Windows Password Reset software; it works on Windows 2000/XP/Vista/7/8/8.1/10 and even Windows server.
Free Download Buy Now(Pro)Step 2: Now, you have to create a Windows password reset disk.
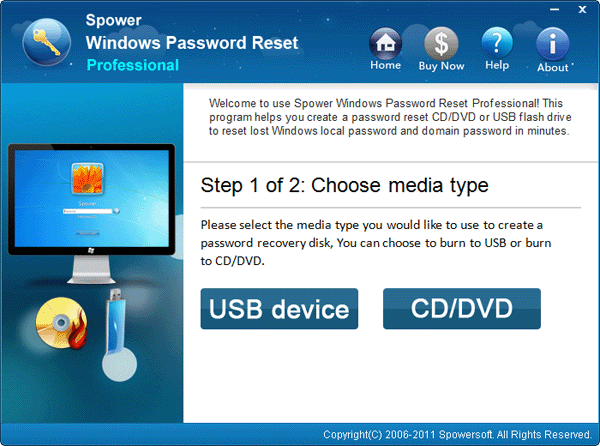
First, you have to decide which type of media you will use; if you are going to select the USB device, you will see this window.
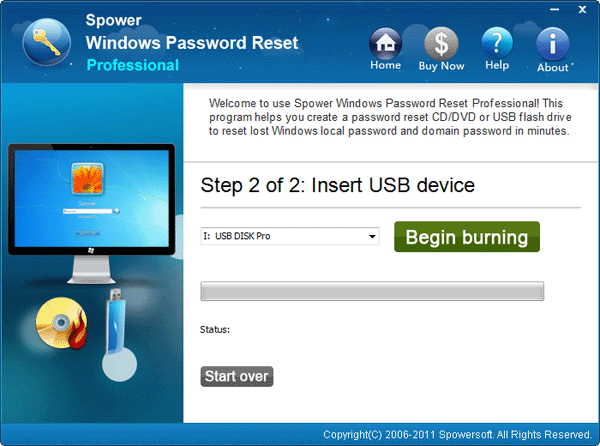
Or you could also select the CD/DVD option, which using CD/DVD as a reset disk.
You will have to select the disk you are burning on and then click on “Begin burning.” After the burning is complete, disconnect the USB device or CD/DVD and inserted it in the locked gateway laptop.
Step 3: Boot the Gateway laptop from the Windows password reset disk:
Insert the newly created Windows password reset disk and Restart the Gateway laptop. While Gateway logo shows, press F12 continuously to enter Boot Menu. Then choose the disk in Boot Menu.

Step 4: Now wait until the software interface loads automatically.
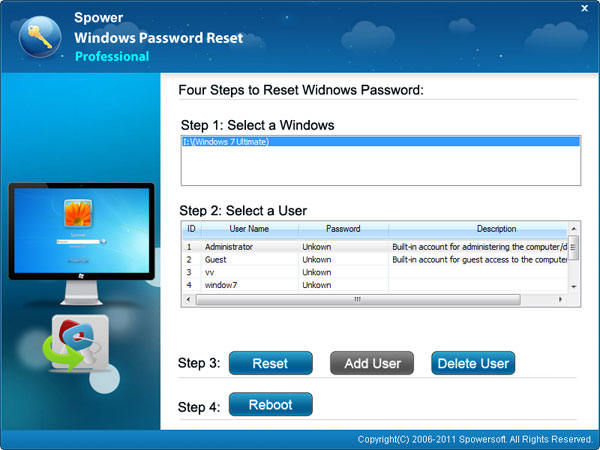
- Select the operating system you have.
- Then select the user from the list which you want to reset.
- After selecting the user, click on “Reset.”
- The last step is that you have to reboot; click on the “Reboot” button (But make sure you unplug the Windows password reset disk before rebooting)
After this, when you boot your laptop again, log in to the user account, and it will be unlocked and solve your case successfully of “I locked myself out of my gateway laptop.”
Method 3: Reset Gateway Laptop Password with Windows Installation Media
Step 1: First of all, to perform this method, you will need another computer or laptop on which you will have to download the Windows 10 Media creation tool.
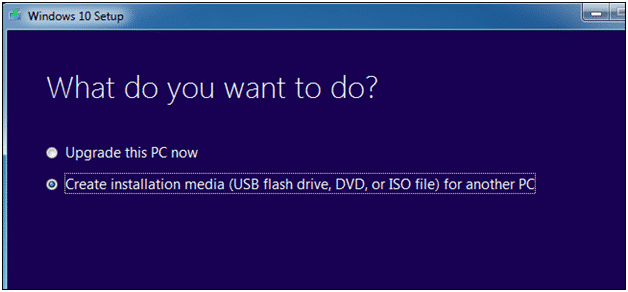
Step 2: If step 1 is complete, open up the Windows media creation tool, then the Windows setup will start loading. After that, select the option which says, “Create Installation media for another PC.” If you have selected the option, later pay focus on the instructions provided, and you will get a USB installation disk.
Step 3: Now, pick up your locked gateway laptop, and insert the USB installation disk of Windows 10.
Step 4: Boot the locked Gateway laptop from the USB Installation disk; if you are not aware of how to do this, this part is for you; otherwise, jump to Step 5 right away.
(There are two ways you can do this; one way is to boot from the boot menu and the other one is from bios)
First of all, insert the USB drive and then restart your gateway laptop. After that, when the Gateway logo appears, press “F12” repeatedly, and the boot menu will pop on your laptop screen. Select the USB drive option from the boot menu, and the setup will start. (If the boot menu is not working, then this is disabled, you can enable it from the BIOS setup. In the BIOS setup, you will have to go to the 2nd heading and select the F12 boot menu.)

Open your bios setup; after that, you will see some options like this.
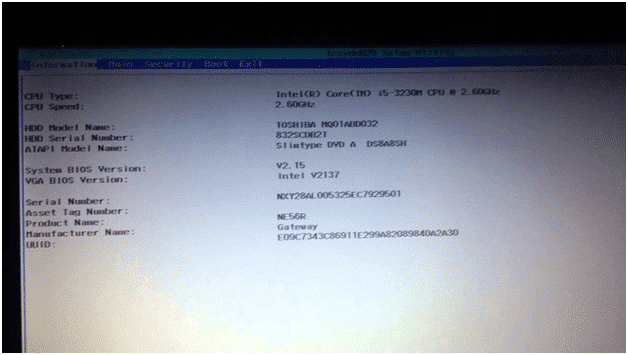
Select the fourth option in the upper menu, Boot. After that, change the boot device priority, put the USB drive on, and restart; the laptop will automatically boot directly from the USB drive.
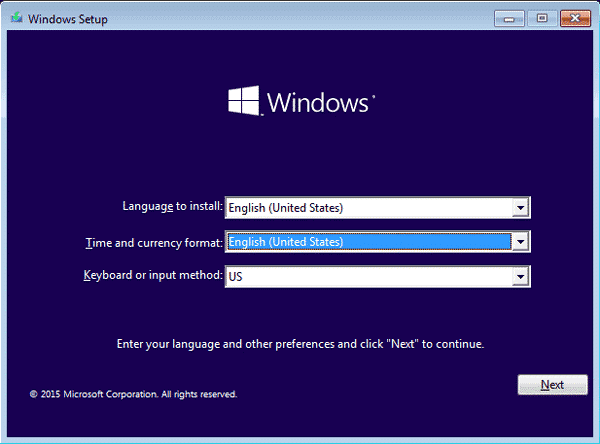
Step 5: The Windows setup will start; when you see the Windows setup on the screen like shown in the picture, press “Shift + F10”, and the command prompt will open up.
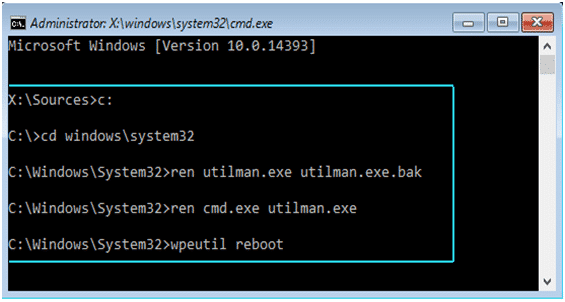
- When the command prompt window opens up, select your system drive (in which the Windows is located), and type CD command like shown in the photo to get inside the system32 folder.
- Now you have to rename two files, the first command will be ren utilman.exe ultiman.exe.bak, and the second command will be ren cmd.exe utilman.exe (just spaces, nothing else)
- Take out the USB drive and type wpeutil reboot to restart the laptop.
Step 6: Gateway laptop will boot up, and when the login screen appears, click on the ease of access icon and open the command prompt. Now you will have to type Net User 'Username' 'Password' and just press enter to run it. For example, you can type Net User Admin ABC. If you have completed this step, restart your Gateway laptop and boot from the USB installation disk.
Step 7: Repeat the steps you did before to open up the command prompt during Windows setup and type these commands. These are the same steps but upside down.

ren utilman.exe cmd.exe
ren utilman.exe.bak utilman.exe
When everything is done, exit the setup and restart your gateway laptop. When the login screen appears, type the new password, and you are good to go. Now you have access to your gateway laptop.
Method 4: Reset Gateway Laptop Password with Offline NT Password Registry Editor
NT password is a tool that was quite popular in the old days. It is a Windows password recovery tool used by developers and hackers, and the most attractive thing is that it’s free. This tool is a bit tricky, and only one wrong step can mess up your computer. But if you are good with computers, then this is an excellent tool for you.
Step 1: The first step is to download the NT password tool from the internet. It is usually in a zip file.
Step 2: Unzip the file and burn the ISO file on a USB drive or CD/DVD.
Step 3: Now insert the disk in the locked gateway laptop; you can boot from it from the boot menu or set it first in boot priority from the bios to boot directly from the media disk.
Step 4: You will see a screen full of texts, select the password option, and type these commands.
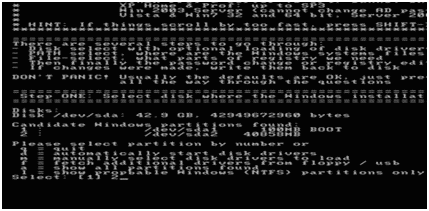
Step 5: After this, select the disk location from the list on which the window is located.
Step 6: When all of that is done, then select the user account from the list and type the new password to which you want to replace the old password. Just restart your gateway laptop now, and you are good to go.
Conclusion:
“How to reset a gateway laptop without password?” These are the best ways to reset your gateway laptop password. Don’t worry if you have locked out yourself; you can still access your gateway laptop by following these methods. As you can see, all the steps are written above, so it’s quite easy to reset the password. You will need to follow the steps carefully because sometimes these things can even ruin your Windows. Then, the only option you will be left with is to factory reset your gateway laptop. So we do recommend to choose using the Windows Password Reset to reset Gateway laptop password for a 100% reset rate.
Free Download Buy Now(Pro)
